DIY Workshop: Martin Guitar Kit Build Part 1
For those who are unafraid to go down the DIY route, Martin Guitar Kits provide an affordable way to own a little slice of Nazareth. But how straightforward is it to build your own acoustic? Huw Price finds out…
The ground floor of Martin’s old North St factory is now the home of Guitarmaker’s Connection, where the Guitar Kits are put together. The kits are assembled from production parts that fail quality control due to minor cosmetic defects, but ours didn’t have any obvious blemishes
All the way back in 2001, I built my first ever acoustic guitar from a Martin Guitar Kit – long (very long!) time readers might even remember that the process was chronicled in the pages of this very magazine at the time. I’m happy to say that it’s still going strong today, and is now in the hands of The Guitar Magazine’s Chord Clinic guru, Rod Fogg. Every time I play it since I handed it on, however, I come away kicking myself for letting him talk me into selling it – it’s matured into a gorgeous sounding guitar. On the plus side, Rod is putting it to much better use that I could anyway…
Since then I’ve built two further acoustics – another Martin 000 kit for my niece and a 12-fret slot head kit from Stewart-MacDonald. The 12-fret didn’t turn out particularly well but, having been dragged from the dry heat of LA through the freezing winters of Chicago to the humidity of New York, that second Martin kit has acquired the tone and road weary grace of a fine vintage acoustic.
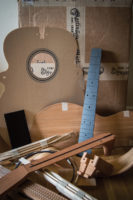
The kit arrives in a box roughly the size of a small combo, and contains all the key bits you’ll need to build your own acoustic
Clearly then, Martin’s Guitar Kits can produce excellent results – some might consider it cheating, but if you only plan to build one or two acoustic guitars in your lifetime, a kit is a sensible choice. Much of the highly skilled stuff is done for you, and there’s no need to invest in specialist tools such as bandsaws, side bending irons, thickness planers and router templates.
I believe that with a bit of ingenuity and patience, anybody can assemble one of these kits, using ordinary hand tools for the most part. Some procedures do require specialist equipment, but we’ll cross that bridge when we come to it. Granted, experience and expertise may be needed to achieve a truly professional finish, but there’s no reason why your kit guitar can’t sound superb. After all, we’re talking about an acoustic made from all-solid tonewoods – so what could possibly go wrong?
It features solid mahogany parts with pre-bent sides and back plates that will need to be joined
The Kit
Much has changed since I assembled that first Martin Guitar Kit all those years ago. Back then I ordered a 000 kit with rosewood back and sides. Although that particular kit is still available to US customers, Martin can no longer export rosewood kits due to increasingly stringent CITES regulations.
This time I’m building an 000 with mahogany back and sides. In Martin nomenclature, it’s the International Mahogany 000 24.9 Guitar Kit and has a list price of $400 plus shipping. You can find it, along with Martin’s dreadnought, OM and jumbo Guitar Kits in the Guitarmaker’s Connection section of the 1833 Shop on www.martinguitar.com.
The top’s grain is straight and fairly tight, with a strong and clear tap tone that bodes well
My first kit also came with a rosewood peghead veneer, an ebony fingerboard and an ebony bridge. Understandably, the rosewood veneer is no longer included and both this kit’s fingerboard and bridge are Richlite rather than wood. The peghead overlay and the V-shaped infill for the tail block join are synthetic, too – probably some sort of shiny black plastic or fibreboard, but it’s hard to tell.
The top seems to be of higher quality than what came with the previous kits, with fairly straight and tight grain lines and lots of cross silking. So this should look pretty fine with some finish applied. I also like the side ears that Martin leave in the waist area, because you can dangle the top from your fingers to test the tap tone. This one produces a very encouraging note – 16 cents flat of a G natural according to the tuner app on my phone.
The Rosette is pre-installed and the herringbone is a classy touch
Both my previous Martin kits arrived with the rosette channels pre-cut but unfilled. This kit turned up with fibre strips and herringbone pre-installed. The factory has done a very fine job but I have mixed feelings. Although I do like herringbone, I hadn’t planned to use it on this guitar, but it’s something I can very easily live with.
The kit binding is black, with an accompanying length of black/white/black purfling. Martin’s fretwire comes supplied in a neat roll so all the pre-radiusing is done for you. When the kit arrives, you must be sure to sift through the contents carefully, because the box is packed with shredded newspaper to keep things protected. Many of the parts are quite small and some are hidden away – taped between cardboard sheets for protection.
Most of the parts are bagged or bundled together like these back braces, so sort through the packaging carefully to find everything
Although the kit doesn’t include a full-sized blueprint or step-by-step instructions, there is a charming and very useful guide booklet penned by Martin’s archives custodian and museum curator, Dick Boak. This booklet is full of practical advice and tips for your build, so study it well and take particular care to examine the parts list on the back page. All the brace positions are clearly marked on the top and back plates.
The book also has a scale drawing showing where to locate the tuner post holes on the headstock, and quite by chance I found a full-sized body outline drawn onto one piece of cardboard packaging. I reiterate – thoroughly check that you’ve found all the bits and cross reference against the parts list before you throw all that paper in the recycling. But do keep the empty box because it’s the perfect place to store everything while you’re working.
The brace positions are clearly marked on the back of the soundboard and this looks like a modern back-shifted X pattern
I can’t speculate on the style of neck that usually ships with this kit, but I requested something chunky – preferably with a V profile – and I couldn’t be happier with this neck. It’s carved from a single piece of mahogany and it’s almost the finished article.
I’ll need to finesse the diamond volute at the back of the headstock, remove the excess width and feather it into the edge of the fingerboard. The fingerboard comes shaped and pre-slotted for frets, along with all the holes for the pearl position marker dots.
The pre-carved neck is solid mahogany, the pre-slotted fingerboard is Richlite and there’s a two-way truss rod encased in plastic
The tuners are Martin-branded die-cast chrome types with small buttons, and they’re bagged up with the nut and saddle blanks, plastic bridge pins and a packet of Martin strings. There’s everything you need to build a Martin-style acoustic, but don’t be fooled into thinking this is a weekend job. Although much of the work has been done for you by Martin, the challenges of jointing the back and setting the neck still lie ahead. Better get cracking.
Developing moulds
One of the problems facing all acoustic guitar builders is the need to maintain a symmetrical body shape with square sides throughout. Check out any one of the Martin factory visit videos online and you’ll see that the company has always used body moulds for this purpose. They’re pretty simple in concept and easy enough to make if you have a band saw and a spindle sander.
The key word there is ‘if’, because I’ve previously attempted to make moulds using a jigsaw and the results were less than satisfactory. Besides which it was both time consuming and hard work. For this project, I decided to try something different.
The centre line and body outline are traced onto a backing board
Regular readers will remember the Gretsch Anniversary restoration I did recently, and for that project I created a body former. Since I was removing the top, I wanted to ensure that the body would retain its shape while it was dismantled. The former worked perfectly – so much so that when I glued the top back on, the sides hadn’t even moved a fraction of a millimetre over the course of a year.
I decide on the same approach for this acoustic, however with the Gretsch I simply glued blocks tight against the sides of the guitar. This time I have to establish a centre line on the backing board and then draw the guitar’s outline onto the board before gluing the blocks.
The only reference provided for the body outline is drawn out on a piece of packing cardboard. Rather than attempt to cut this with a craft blade and risk messing it up, I copy the outline onto tracing paper and cut out the shape with scissors.
A set square is used to ensure that this mould block is glued onto the backing board square to the centre line
With the tracing paper carefully positioned on the centre line, I mark out one side of the body then flip the paper over to draw the other side. Martin specs state that 000-sized bodies are supposed 19.38 inches long, but this outline ended up just 0.05 inches longer. I figure that’s close enough and drew lines at right angles to the centre line at the end points.
From a piece of 1.5 by 2.5-inch planed timber I then cut 12 blocks – 10 two inches long and two four inches long. The four-inch blocks are then carefully aligned on the end lines and the remaining two-inch blocks are glued at spaced intervals around the body outline.
The sides fit snugly into the mould and conform very closely with the body outline on the backing board
Before gluing these blocks, I use a set square to establish which of the planed surfaces forms the best right angle. This is important because in addition to establishing the body shape, these blocks are intended to hold the sides square. This type of mould is cheap and easy to make, and it takes me less than two hours all in.
Fitting in
Unlike some other kit parts, Martin’s sides – or rims – are pre-tapered. This means they are flat on the top but the back surfaces gradually narrow from the waist to the neck block area – where an acoustic guitar’s body depth is at its minimum. Be sure to establish which one is which, because the heel block has up and down sides.
At this stage, the upper edges of the rims should face downwards in the mould and you’ll know when you have it right because they’ll be flat against the outline board all around the edges. If they’re touching the board at the tail block end but floating above it at the neck block end, they’re the wrong way around.
This time the set square confirms that the sides are square to the base
Although the pre-bent sides have relaxed somewhat, once I have the edges butted up and clamped on the centre line at the neck end, they require very little persuasion to conform to the outline. In fact, clamps on each side at the blocks adjacent to the tail block are all that’s needed. There’s a gap of exactly 0.5 inches at the tail, but that’s where an inlay strip will end up later in the build. Taking my set square all around the sides, everything looks straight and true.
Sticky moments
Now for the exciting part – the first bit of assembly, gluing the heel and tail blocks to the sides. The tail block is oversized, so I mark the correct length and cut off the excess leaving it a tiny bit proud for insurance. The neck block is over-sized, too, but I’ll deal with that later.
When restoring my Gretsch, I particularly enjoyed using hide glue for the first time. Is it the optimum adhesive for tone? The big guys charge extra for it and it was used throughout the vintage era. For this reason I’ve decided to use it here wherever possible.
One difficulty with hot hide glue is that you need to work quickly, because it grabs fast and you need to clamp up while the glue is still hot. It’s important to be well prepared and that means marking out where you want the parts to end up, devising a clamping strategy, and having a couple of practice runs.
Construction begins with gluing the heel and tail blocks and clamping with various sized clamps
With the exact positions of the heel and tail blocks drawn onto the template board, I apply clear plastic packing tape to the template blocks and the template board. Tape is needed to ensure that the blocks stick only to the rims and not the mould. While the glue was coming up to temperature (60°C) I heat the tail block with a hairdryer, as theoretically the open time will be extended if the glue is applied to a hot surface.
Even so, I have to apply the glue, position the block and clamp it all within a minute. It’s certainly more stressful and challenging to use this type of glue, so if you’re new to this [or a vegan, for that matter! – Ed] I’d suggest using Titebond Original instead. Either way, leave everything clamped up overnight and don’t stress the joints for 24 hours. That’s probably enough stressful gluing for one month, don’t you think?The post DIY Workshop: Martin Guitar Kit Build Part 1 appeared first on The Guitar Magazine.
Source: www.guitar-bass.net


