
How to Build a Beer Cooler Ukulele
Somebody asked me, “what’s the most bizarre thing you could ever feature in your Guitar World column?” Uh oh. If you’ve ever read my past articles, you’ll know that I’m basically the weird uncle they keep locked in the attic, so their question was a true challenge.
But then I realized that I’ve never showed you all how to make a ukulele out of a Styrofoam beer cooler!
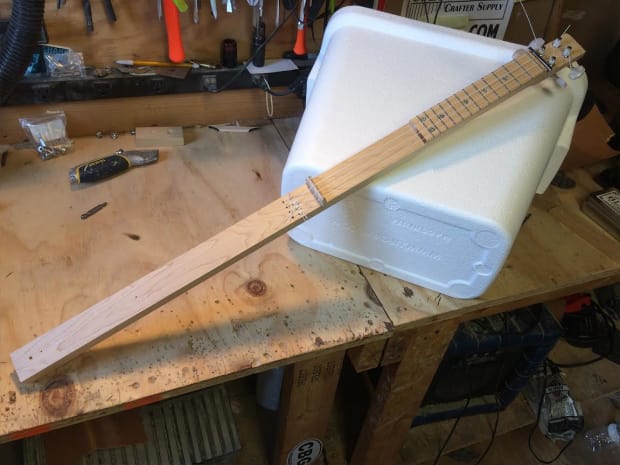
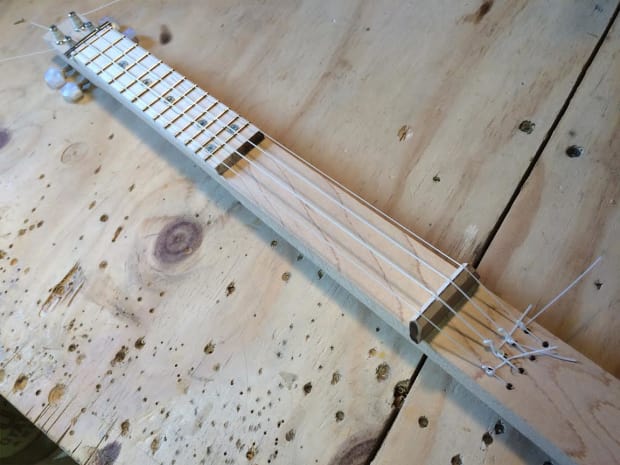
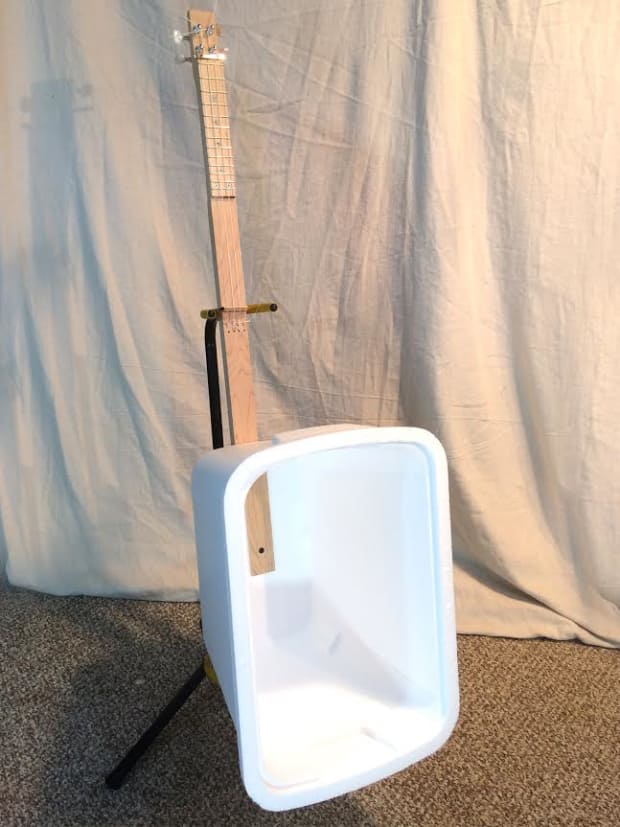
This has got to be the most alien-looking uke you’ll ever see and it’s unbelievably awkward, but it sounds incredible! Simply put, the Styrofoam Cooler Ukulele is nothing but a neck without a body and a huge cooler screwed to the butt end. The light and airy properties of the Styrofoam act as a serious resonator. You can literally hear the notes coming out of the open end of the cooler like the horn of an old Victrola record player.
Here are the parts I used:
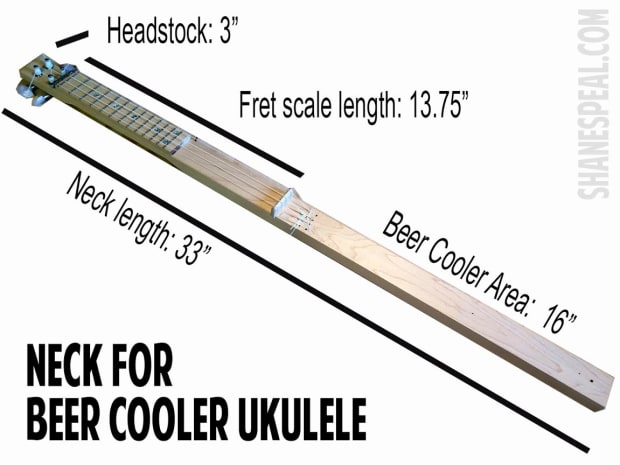
- 1×2 plank of maple or poplar, 33 inches long
- A separate piece of x 7 ½ ” x 2” x ¼”maple or poplar for the fretboard
- Small scrap of maple or poplar for the floating bridge, 1.5” x 1” x ½”
- Medium fretwire–enough for 13 frets (The instrument has 12 frets plus a zero fret)
- A four pack of guitar tuners
- A pack of standard ukulele strings
- A styrofoam cooler—I chose the smaller size that fits 24 cans of beer. Larger coolers make this instrument freakishly awkward
- Two drywall screws and another scrap of 7” x 2” x ¼ ” wood to serve as mounting plate inside the cooler.
- Six flathead screws, ½” long
This is a very easy project! Although the thought of fretting an instrument might be daunting for some people, consider this project a good beginner’s instrument to learn the fretting process. BTW, I highly recommend the C. B. Gitty Fretting Starter Kit. It has all the tools and guides needed to get you going. (It’s what I still use for my own projects.)
I built this guitar a couple years ago and unfortunately didn’t photograph the building process. However, the steps are easy and can be described with photos of the completed uke.
Measure 3” from the top of the long piece of wood. This will be your headstock. Remove ¼” from the face of the headstock area. I used my belt sander but you could use a coping saw, jig saw or whittle the thing with a pocket knife!
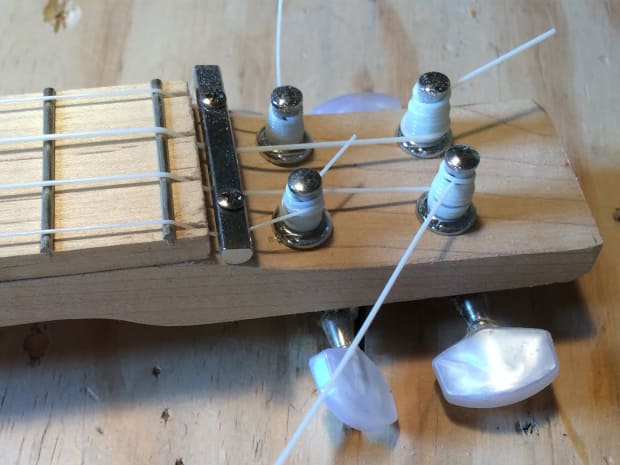
Drill four holes for the tuners using a ¼” drill bit. Make sure the tuners are spaced 1” apart to ensure the back mounting plates don’t overlap. Insert the bushings and install the tuners.
Make the fretboard separately. For this project, I chose a 13.75″ soprano scale. Take the 7 ½ ” x 2” x ¼” piece of wood and measure in ¼” and mark a line across. This will be your zero fret and the starting point for the rest of the frets.
Set your ruler on the zero fret line (not the end of the piece of wood) and mark the following lines for your frets:
· ¾”
· 1 ½”
· 2 ¼”
· 2 7/8”
· 3 ½”
· 4”
· 4 ½”
· 5
· 5 ½”
· 6
· 6 ½”
· 6 7/8”
Note: These fret measurements aren’t 100% exact. We’re building a Styrofoam uke, not a Kamaka! If you want more precise fret measurements, check www.stewmac.com/FretCalculator.
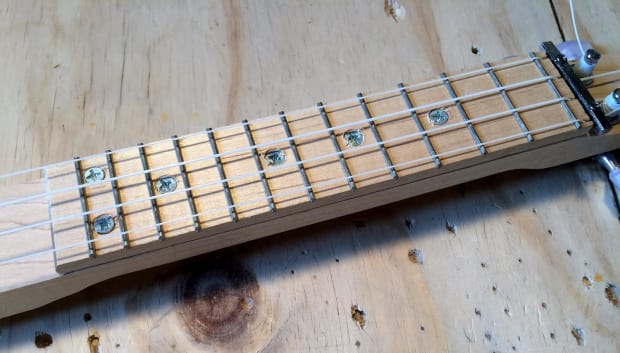
Use a fretting saw or coping saw to cut the fret slots and install the frets. Again, if you’ve never done this before, follow the instructions on the C. B. Gitty Fretting Kit or search online for tips.
Drill mounting holes for the flathead screws at the 3rd, 5th, 7th, 9th and 12th fret markers. The screws serve as fret position markers and also attach the fretboard to the neck.
Mount the fretboard to the neck, 3” from the end. Make sure the zero fret is positioned toward the headstock or your fretboard will be upside down!
Place your ruler at the zero fret and measure exactly 13.75”. Mark a line across the neck. This will be the location of the floating bridge.
Drill two holes for each string, 2 inches behind the placement of the floating bridge. These will be your string anchors where you feed the strings through and tie them tight.
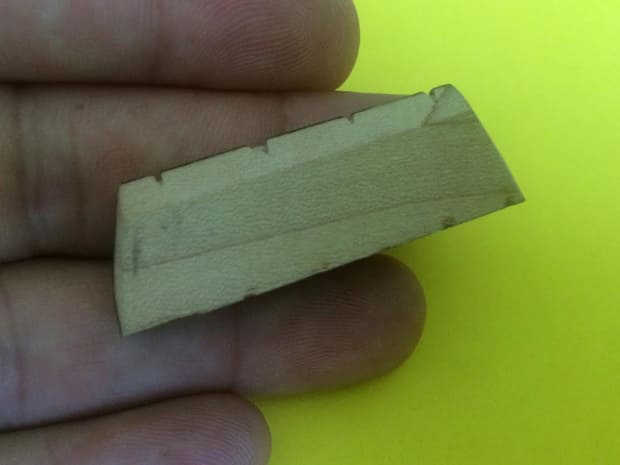
Using sandpaper or a pocketknife, shape the top of scrap 1.5” x 1” x ½” scrap wood into a rounded edge. This scrap will serve as the floating bridge.
Place the last scrap of 7” x 2” x ¼ ” wood at the butt end of the neck and drill two small pilot holes at 1 ½” and 6” from the end to serve as mounting plate inside the cooler.
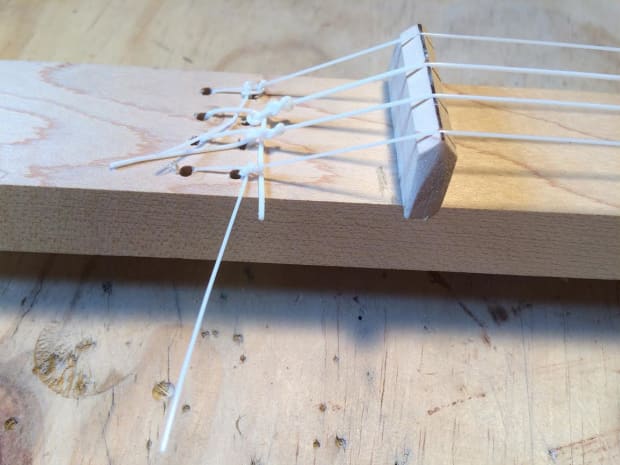
String up the ukulele by tying the ends to the double holes behind the bridge area.
Place the floating bridge under the strings and move it back to the 13.75” mark. Tune it up to My Dog Has Fleas (GCEA). If the action is too high, simply pull the bridge off and sand down the base as needed.
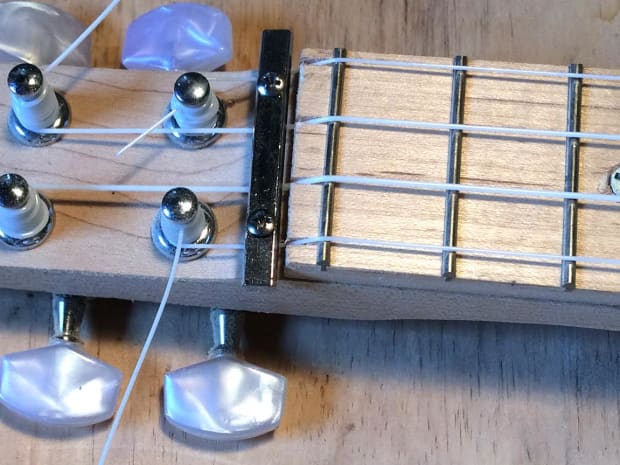
Note: When I first built this monstrosity, I just rolled the strings over the zero fret. I later found that they moved around too much. To ensure proper string tension, I added a Floyd Rose style string tree (find ‘em cheap on eBay) and added some notches behind the zero fret.
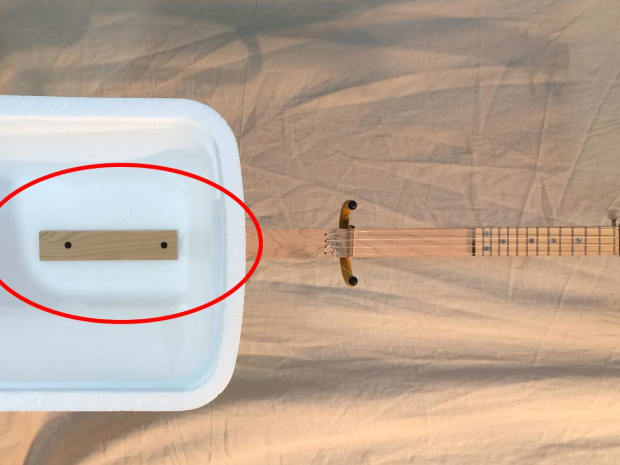
Attach the cooler to the end of the stick using a drywall screw and washer.
Optional: Add strap buttons on the back of the neck. I placed mine 10” and 22” from the butt end.
Musician and author, Shane Speal is responsible for the resurgence of cigar box guitars in modern music. He fronts the DIY-instrument band, Shane Speal and the Snakes, curates the Cigar Box Guitar Museum inside Speal’s Tavern in New Alexandria, PA, and has made 2,000 cigar box guitars to date. His latest book, Making a Poor Man’s Guitar, (Fox Chapel Publishing, August 2018) combines DIY instrument projects with their deep blues history.
Source: www.guitarworld.com


